Pages

Friday, August 29, 2014

Baby's Room : Curtain dilemma

I obsess a lot about curtains. Maybe I am the only one. Forever ago, I bought beautiful curtains at Bouclair for our spare bedroom in an apartment we lived in. When we moved, they sat in a box. The idea was to reuse them in the baby's room. Unfortunately, they don't quite match the bedding and they let some of the light in. We had roller shades (yuck) in the bedroom but we won't be replacing those ugly things until we replace the windows next year so I am stuck with them in most bedrooms... except the baby's... because we lost the brackets to put the ugly roller shade on the wall. Hence, I needed curtains that would block the light... but I hate blackout curtains. They are soooo plasticky? Double yuck. Anyway, I spent most of my weeekend trying to find the perfect curtains that would match and block most of the light. At the end of the day, I was mostly tired, hadn't found any curtains but I had purchased 4 pillows (don't ask!). Then I found something called "Blackout liners" at Lowes. I had heard about them but at $40/panel, I didn't want to splurge. Well, Lowes had them on sale for $12!


Blackout Liner Panels
The package says it includes 2 panels but I needed both to cover 1 of my curtain panels. They came with the hooks too (picture below)
Blackout Liner Panels - Hooks

How to add them to existing curtains

All I had to do was put the hooks into my existing curtain and then there is a series of little loops at the top of the blackout liner, just insert them in the hooks and tada, your blackout liner is hiding behind your existing curtain.
Instructions
I took a picture of the instructions... it works with all sorts of curtains (not just grommets). I was pretty excited. So now I have found the perfect solution for the existing curtains. They will just have to do for now... until I find a good sale on my dream curtains for the baby's room!

Thursday, August 28, 2014

Linen Closet - Organized!

This past weekend, my husband surprised me with just about 10 guests. I wasn't too pleased with that as I like to be told in advance when people will be crashing at my place but there were already in the house and there was nothing I could do. I quickly cleaned the main bathroom which also serves as a guest bathroom. Believe it or not, everything on the countertop got dumped in the linen closet, conveniently located inside the bathroom. That's when the mess there reached an all-time low (I wish I had a picture). So, on the same night, I couldn't help it... I had to organize.

I am a big fan of the Home Depot clear shoe boxes which they sell for less than a dollar! So I took everything out and sorted:

- Make up
- Personal Hygiene
- Dental
- Travel size
- First Aid

I put all the sorted items in clear boxes, rearranged everything on the shelves and voilà! I was done. Some of my own personal items went in the master's bedroom bathroom but the rest can stay in the linen closet. The First Aid Kit is in a small fishing tackle box I bought many years ago at Wal-Mart. I'll do a post some day!

Linen Closet
Now there is still room for improvement. I could put all the Bath & Body Works soaps in a box, same with the shampoos... but for now, it's a bit more organized and it's making me happy!

Wednesday, August 27, 2014

IKEA "Flaxa" Bed

In my first post about my daughter's bedroom I mentioned that I had made slight changes to the IKEA Flaxa bed we had purchased. The storage drawers were black and there was no option at IKEA to get a different colour. I painted them to match the bedroom walls "Hot Chocolate" by Benjamin Moore Aura Paint (2 coats on each side) and then used a clear coat on top (2 coats on the front). This is the final product! Tada

Ikea flaxa bed painted
IKEA "FLAXA" Bed - Painted


Monday, August 25, 2014

Kalanchoe

 Well, it's been busy around here. I tackled too many projects and ended up in the hospital with a kidney stone and here I am, tackling more projects. I am nesting so much, anticipating the arrival of baby #2, that I am even buying indoor plants at this point. How typical. Today I purchased a Kalanchoe plant. Apparently it is one of the 8 hard-to-kill houseplants for a cursed green thumb. I am not quite certain I am that cursed but you never know!

Kalanchoe
Kalanchoe Plant

Tonight I shall put it in a beautiful pot in the living room and call it a day! I have a few projects on the go. Last Saturday night I decided my linen closet needed a makeover (or maybe just a clean-up) so I will post pictures tomorrow. The linen closet is in our main bathroom which also is used by guests when they come to our house. Imagine how happy I was that our Sunday night guests accidently opened that little door! It was actually clean! I have also been working on the baby room. It's nearing completion! Yay. Pictures will come soon :)

Thursday, July 31, 2014

Baby's Room: Crib Bedding

I have the hardest time finding crib bedding I like at a reasonable price. I really lucked out with my daughter because I ended up paying $50 CAN for the wonderful Jillian McDonald "Lullaby Breeze" at Toys R Us. It was on clearance and I believe the regular price was close to $150 if not more. I was very proud of myself!

No such luck for Baby #2. I went to every store I could think of and it seems like the same crib bedding sets in the USA are cheaper than the ones in Canada. The prices are just ridiculous. And I also tend to be picky, even when I find a sale! I ended up on Walmart.com and found this gem:

Nojo - Baby Buccaneer 3pc - Baby Bedding
Nojo - Baby Buccaneer 3pc

You can also purchase the bumper pad on their website. Lo and behold, they ship to store! Which is extra convenient because we are going camping in Montana this weekend. So I will be picking up the baby bedding when we are there and this cute set only cost me $50 US. I am excited! We will start working on the baby's room when we come back!

Saturday, July 26, 2014

Personalized Vinyl Calendar

SayItWithStyle - Personalized Vinyl Calendar
I am in love with this vinyl calendar! You buy the decal from SayItWithStyle Etsy Shop and apply it in a regular 16x20 frame that will match your decor. I am not sure if we would have use for it since my husband and I tend to put our appointments in our Google calendar and sync it to both our phones. How do you keep track of all your appointments?

Friday, July 25, 2014

My daughter's bedroom (Part III)


Chalkboard in toddler bedroom
The chalkboard!
It is done! We bought a chalkboard at Staples. I thought about painting the wall with chalkboard paint but it would have cost more than just buying the chalkboard itself. If I ever decide to cover a bigger area then the chalkboard paint would be handy. I painted the trim with white semi-gloss Aura paint and did 2 coats and hung it on the wall. She loves it! And now, I can move on to my next project!

Wednesday, July 23, 2014

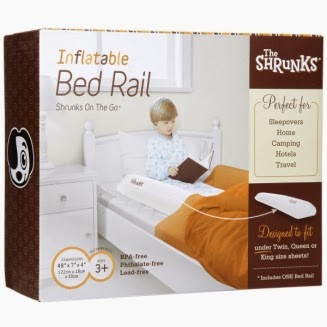
Product Review: The Shrunks Inflatable Bed Rail

Since we were redoing my daughter's bedroom and putting her in a twin bed I decided I also needed a bed rail. I'm not a big fan of bed rails (the ugly factor?) but they are a necessary part of life. I spent a long time looking for bedrails and then thought that installing one and then having to uninstall it in a couple of years seemed like a real chore. I am just lazy like that. I also read that standard bed rails don't work on every bed frame. I stumbled upon The Shrunks Inflatable Bed Rail.
The Shrunks Inflatable Bed Rail Review


I thought it would be perfect because I could also take it on trips! I ordered it. It came a few days later in the box. It is super compact and light with a case to put it in together with a foot pump. If you want, you can take it on the plane in case of an unexpected layover.

It took (not quite 30 seconds like it advertises) less than a few minutes to put together and it slipped right under the fitted twin sheet. The foot pump is very quiet which is handy if you are arriving late and would like to put your already sleeping child to bed without waking them up.

Because it is inflatable, it is soft and my daughter likes to rest her head against it (as opposed to an uncomfortable metal bar). So far it has stayed in place, she hasn't fallen off the bed and it's easy to take out and put back in place. My daughter tried to grab onto it and climb over it (which she did successfully by the way) and it still stayed under the twin sheet. I definitely recommend it if you are looking for a practical alternative to a bed rail.

N.B. I wasn't paid to review this product.

Tuesday, July 22, 2014

Organizing Toys


I have been wanting to organize and sort my daughter's toy clutter for a while. There were toys everywhere and it was driving me a bit insane. Especially because all she ever seemed to do is dump everything and go! With baby #2 on the way, I don't want to have to worry about the small pieces of her toys all over the living room floor so I decided it would be best to keep them all in her closet and then she could bring them down one at the time... which is the way I was raised. At this point, I don't think we have enough toys that we need to start thinking about selling / donating either so I just wanted to organize what we already have.

What storage system should I use?


Trofast IKEA storage
 Some people seem to swear by the toy bin system. I am not a big fan. Mostly because the multicoloured bins don't usually match any decor... and it also seems like all my daughter would do is dump all the bins on the floor. Even if there were cute little picture tags in front of them, she would still dump them. So that option was ruled out. Same applies to fabric boxes. I decided to go with shoe boxes (clear boxes). I figured everyone could see the content first hand, the boxes could go on shelves in the closet and it wouldn't matter which direction the boxes faced to show off the little tag with the name or picture of the content on it. Off I went to Home Depot and bought shoe boxes at $1 each and other clear boxes of different sizes.

What needs to be organized?
I assessed the clutter in our living room/kitchen. Markers, crayons, coloring books, play-doh; fruits, veggies, extra pots and pans from her Step2 Lil' Chef's Gourmet Kitchen ; animals, blocks from her Hape Fantasia Blocks Train.

I also assessed clutter in her bedroom. Barbies, barbie accessories, barbie clothes, stuffed animals, polly pockets from when I was younger, dress-up clothes. I went thru all the toys and decided what would stay in the living room and what would go in her bedroom. I put everything in her bedroom that I wanted there and then I decided to tackle the clutter in her bedroom thanks to my new boxes.

How do you organize it?
I sorted items by category. All the Barbies went in one box, accessories in another, dress-up costumes, polly pockets too. I put all the extra fruits and veggies in another box (leaving some in her kitchen), The play-doh got its own box too etc. etc. We already had shelves in the closet so I put all the boxes on the shelves in the closet. Closed the door and tada! The mess is gone. When she opens her closet she can see what is in each box and ask to play with it or grab it herself if it's on the lower shelf. I purposely put the toys she plays with often within her reach.

But my child will try to climb it Not if you teach them not to!
And they will fall and hurt themselves Then they will learn quickly not to climb!
I will have to always help them get toys from the shelves Probably a good idea if you don't want the lego to dry out or the entire floor to be covered with toys that have just been dumped!

On the first day in her room my daughter picked up her train box and came downstairs to play with it. When we went back upstairs she pointed to the box of play-doh on the higher shelf and asked to play with it. Success.

Should I put pictures or names on the boxes identifying the content?
You can. I have seen a lot of people do it online. I don't think it's necessary if you have clear boxes to write "Barbies" on a box where you can obviously see the Barbies. I originally took pictures of the content and had planned to stick the pictures in front of the box but changed my mind afterwards. The only exception is that I still had the box for the Hape Train so I cut out the picture and stuck it in the box so I could remember how many blocks there are when it's time to clean up!


Organized toddler closet
Her closet


Organized toddler closet
Her closet: side view
  
Her closet: explained
Toys are on the shelves and bigger items/boxes under the shelves. My own toys I moved from my parents house that she cannot yet play with or I'd rather she doesn't have access to are on the very top shelf. The two baskets on the top shelf contain 1)clothes that need to be put away because they no longer fit her 2) clothes from the previous season. The chest has all her dolls and stuffed animal in it (which will need to be purged at some point!).


Monday, July 21, 2014

My daughter's bedroom (Part II)

My daughter's bedroom is almost done! All we need to add is the chalkboard and then I think I will be content with it for a while.


Renovated toddler bedroom
My daughter's bedroom!
  The furniture, curtains and lights are from IKEA. Her night stand lamp is about 10 years old... but also from IKEA (I am a big fan). My daughter loves looking at pictures so I wanted to do a picture display. I couldn't afford to spend a ridiculous amount on frames at Michael's so I bought cheap frames at the dollar store and painted them with my acrylic paint. I was able to customize it to match her bedding set. Then I just stuck whatever picture of her I could find. I have to print some recent ones at Wal-Mart in the near future!


Toddler painted gallery wall
Gallery wall
  Thanks to Martha Stewart, I did some pompoms (tissue paper flowers) to match her room and stuck them right above the bed. We have a popcorn ceiling so we literally had to nail them to the ceiling to make sure they don't fall on her while she's sleeping.


Hiccups Little Red duvet cover and pompoms
Bed, bedding and pompoms
  She was really excited about her bedroom! I have yet to show you how I organized the closet and her chalkboard we will be putting up.

Friday, July 18, 2014

My daughter's bedroom (Part I)


Sadly enough, my daughter, now 2 1/2 years old, has never really had a fully decorated bedroom. Now that I am expecting again, I am hoping I can give her a space in our new home that she will like.


"Before"

This is what the room looked like when we purchased the house (minus the furniture that they kept). We had since dumped in all of the baby stuff and miscellaneous items in the house. So oviously, it needed a lot of love! Just look at that light fixture!

The first thing we did was pick the paint colour. Not exactly in the order I like to do things but my husband convinced me on Benjamin Moore's Hot Chocolate. I was a bit reluctant but we got a mistint and paid such a minimal price it was hard to say no.

During a trip to Simons (one of my favorite stores!), I found the most perfect duvet cover for the bedroom and it matched the colour perfectly. Even better, it was on sale! It is made by the company Hiccups.

Hiccups "Little Red" Duvet Cover Set


Aren't the colours awesome? The brownish colour on the duvet matches the paint colour perfectly. I was pretty excited!

We didn't have a twin bed to use or any furniture for that matter that I could have painted and put back into shape. The furniture in her baby room is going to stay there for baby #2 so we figured we would pay a visit to our dear friend Ikea. We settled on a MALM night table and dresser and a FLAXA bed. I loved the Flaxa bed for the additional storage underneath. I figured it would be handy.


IKEA Flaxa bed
IKEA "FLAXA" Bed

The only issue with the Flaxa bed is that the drawers only came in black which was a bit of a problem for me. I thought it would clash with the rest of the bedroom. Nothing some paint and a coat of varnish can't fix though! Before assembling the drawers I painted over the black with the wall colour (2 coats on each side) and added a clear coat on top! Tadam. ( I will add a picture later, I forgot to take one !)

Now the fun part begins, decorating and organizing her room. Not that putting together IKEA furniture wasn't fun! I'll post about that later!

Thursday, July 17, 2014

New home


Our new home!

Last November, my husband and I purchased a home. I was thrilled since we spent most of our married life living on a family farm that had slowly been taken over by mice. We have done quite a bit of work so far on the house but several projects remain. Hopefully this blog can help see them all to completion!